This code is a script written in the R programming language that generates a line plot from a data set stored in an Excel file. The script starts by importing several libraries, including readxl, ggplot2, extrafont, and reshape2, which provide various functions for reading Excel files, creating plots, and reshaping data. The user is then prompted to specify the path of the Excel file and the name of the sheet containing the data. The script then reads the data from the specified sheet and reshapes it into a format suitable for plotting. Finally, the script creates a line plot using ggplot2 and saves the resulting plot as a PNG image file. The plot includes labels for the x-axis, y-axis, and lines, and includes various modifications to the plot’s appearance, such as changing the background color and modifying the font and color of the text.
How to Run the Code
To run this script, you will need to follow these steps:
- Install the required libraries: In order to run this script, you will need to install the
readxl,ggplot2,extrafont, andreshape2libraries in R. You can do this by opening an R console and running the following commands: install.packages(“readxl”); install.packages(“ggplot2”); install.packages(“extrafont”); install packages(“reshape2”). - Open the script in an R editor: You can open the script in an R editor such as RStudio or the built-in RGui editor.
- Specify the input and output paths: In the section of the script labeled “THINGS TO SPECIFY”, you will need to specify the path to the Excel file containing the data and the name of the sheet within the file that contains the data. You will also need to specify the path where you want the output image file to be saved. Make sure to use double backslashes (
\\) to separate the folders in the file paths. - Run the script: Once you have specified the input and output paths, you can run the script by selecting all of the code and pressing the “Run” button in your R editor.
- Check for the output file: After the script finishes running, you should see a new PNG image file at the specified output location. If you don’t see the file, check the output window in your R editor for any error messages that may have occurred during execution.
Note: If you want to save the plot as a TIFF file, you can un-comment the ggsave line at the bottom of the script by removing the # symbol at the beginning of the line. This will save the plot as both a PNG and TIFF file.
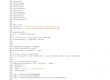
Overall Code
#--GRAPHING MULTIPLE SPECTRA--
#Graphs spectra that is placed in this way in an *.xlsx file
#+--------------+-------------+-------------+-----+-----+-----+-----+-----+
#| Wave Number | Sample 01 | Sample 02 | ... | ... | ... | ... | ... |
#+--------------+-------------+-------------+-----+-----+-----+-----+-----+
#| 788 | Value | Value | ... | ... | ... | ... | ... |
#| 792 | Value | Value | ... | ... | ... | ... | ... |
#| 796 | Value | Value | ... | ... | ... | ... | ... |
#| 800 | ... | ... | ... | ... | ... | ... | ... |
#+--------------+-------------+-------------+-----+-----+-----+-----+-----+
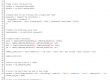
#IMPORT MODULES
library("readxl")
library("ggplot2")
library(extrafont)
loadfonts(device = "win")
library("reshape2")
#THINGS TO SPECIFY
input_path <- "C:\\Users\\barbi\\Desktop\\input_data.xlsx"
ouptut_path_png <- "C:\\Users\\barbi\\Desktop\\output.png"
x_unit <- "Wavenumber"
y_label <- "Intensity"
x_label <- expression(Wavenumber/cm^-1)
width_of_image <- 12 #inches, change if it is too squished or long.
############################################################################################
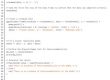
#PART 01: TRANSFORMING SPECTRA TO LONG TABLE
############################################################################################
#IMPORT *.xlsx file for spectra
input_data <- read_excel(input_path)
spectral_data <- input_data[, -1] # Exclude the first column
# Transpose the data and create the x-axis data for melting
transposed_data <- t(spectral_data)
x_axis_data <- transposed_data[1, ]
spectra_data <- transposed_data
# Create the melted data frame
spectra_melt <- melt(spectra_data)
colnames(spectra_melt) <- c("SampleName", x_unit, y_label)
# Convert the x-axis data to numeric
x_axis_data <- as.numeric(x_axis_data)
# Count the number of unique samples in the "Sample Name" column of spectra_melt
num_samples <- length(unique(spectra_melt$SampleName))
# Extract the unique wavenumbers from the "Wavenumber" column of input_data
unique_wavenumbers <- unique(input_data[[x_unit]])
# Repeat the unique wavenumbers based on the number of samples
repeated_wavenumbers <- rep(unique_wavenumbers, each = num_samples)
# Assign the repeated wavenumbers to the "Wavenumber" column in spectra_melt
spectra_melt[[x_unit]] <- repeated_wavenumbers
############################################################################################
#PART 02: PLOTTING DATA
############################################################################################
#GRAPH raw non-averaged spectra
ggplot(spectra_melt,
aes(x = Wavenumber, y = Intensity, color = SampleName)
) +
geom_line() +
#Writing axis labels
labs(
y=y_label,
x=x_label
) +
theme(
#Modifying plot background
plot.background = element_blank(),
panel.background = element_blank(),
panel.border = element_rect(color = "black", fill = NA, size = 3),
#Modifying plot grids
panel.grid = element_line(),
panel.grid.major = element_line(),
panel.grid.minor = element_line(),
panel.grid.major.x = element_line(),
panel.grid.major.y = element_line(),
panel.grid.minor.x = element_line(),
panel.grid.minor.y = element_line(),
#Modifying color, type, and font of text
axis.ticks = element_line(size = 2, color = "black"),
axis.title.x = element_text(size=12, color = "black", face="bold", family="serif"),
axis.title.y = element_text(size=12, color = "black", family="serif"),
axis.text = element_text(size=12, color = "black", face="bold", family="serif")
)
dev.off()
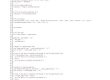
############################################################################################
#PART 03: SAVING DATA
############################################################################################
#Save plot in *.tiff and *.png
ggsave(ouptut_path_png, bg = "white", width = width_of_image)
#sggsave(ouptut_path_tiff)
References:
- Wickham, Hadley; Bryan, J. Readxl: Read Excel Files. 2019. https://cran.r-project.org/package=readxl..
- Wickham, H. Ggplot2: Elegant Graphics for Data Analysis; Springer-Verlag: New York, USA, 2016.
- Chang, W. Extrafont: Tools for Using Fonts. 2022. https://cran.r-project.org/package=extrafont.
- Wickham, H. Reshaping Data with the Reshape Package. J Stat Softw 2007, 21 (12), 1–20.

Classifies, quantifies, and explores data using spectroscopy techniques coupled with chemometric routines.